Photoshop can be overwhelming with all its tools and options. Using keyboard shortcuts can make your editing faster and easier.
Whether you are working on files, using the basic or detail panels, or applying presets, shortcuts can help you navigate more smoothly.
You can also quickly increase or decrease ratings with a simple key press, or add color labels to your images without searching through options.
Mastering these keyboard shortcuts will make your workflow more efficient. You'll find it easier to focus on your creative ideas instead of getting lost in the interface.
Read on to learn how to speed up your Photoshop skills and enjoy the editing process more!
Most Used Photoshop Keyboard Shortcuts
Knowing the right shortcuts can make your Photoshop experience faster and easier. Here are some key shortcuts that you will find helpful for file management, viewing, and selecting tools.
File and Edit Shortcuts
Managing your files and edits quickly is vital in Photoshop. Here are some important shortcuts:
- Ctrl + N: Create a new file easily.
- Ctrl + O: Open an existing file without fuss.
- Ctrl + S: Save your work frequently to avoid losing progress.
- Ctrl + W: Close the current file when you’re done.
- Ctrl + Z: Undo your last action. You can also press it again to redo.
- Ctrl + Shift + Z: Redo an action that you just undid.
These shortcuts speed up your workflow by letting you avoid the menu.
View and Zoom Shortcuts
Zooming in and out is crucial for detailed work. These shortcuts help you adjust your view:
- Ctrl + +: Zoom in for a closer look at your image.
- Ctrl + -: Zoom out if you need to see more of your workspace.
- H: Use the Hand Tool to move around your image easily.
- Ctrl + 0: Fit your image to the screen.
- F: Toggle between full-screen mode and the regular view.
Photoshop keyboard shortcuts can significantly boost your editing efficiency. Speaking of efficiency, 60% keyboards offer a compact design that maximizes desk space. Check out our 60% layout keyboard collection to explore these space-saving wonders.
Tool Selection Shortcuts
Quickly selecting the right tools makes a big difference. Here are some key shortcuts to remember:
- V: Select the Move Tool for moving layers or objects.
- B: Switch to the Brush Tool for painting.
- E: Use the Eraser Tool to remove parts of your image.
- Z: Activate the Zoom Tool for more precise adjustments.
- R: Use the Rotate View Tool to change your angle easily.
- Ctrl + T: Transform your selected layer or object.
These shortcuts can save you lots of time while you work.
Layer Shortcuts In Photoshop
Mastering layer shortcuts in Photoshop can make your editing process faster and smoother. You’ll learn how to create, manage, blend, group, and merge layers effectively.
Creating and Managing Layers
When you need to add a new layer, just click on the New Layer icon in the Layers panel. You can create a new layer below the selected one by holding down Ctrl (Windows) or Command (Mac) and clicking the icon.
To copy a layer, select it, then use Ctrl + J (Windows) or Command (CMD) + J (Mac). This creates a new layer that duplicates your selection. If you want to hide a layer, simply click the eye icon next to it.
Locking layers helps prevent accidental changes. Just click the lock icon in the Layers panel. You can select all layers at once using Ctrl + A (Windows) or Command + A (Mac).
Layer Blending Shortcuts
Blending options allow you to change how layers interact. To access these options, right-click on a layer and select Blending Options. You can also change the opacity by selecting the layer and pressing Opacity in the top-right corner.
To quickly select the top or bottom layer, use Ctrl + Shift + [ (top) or Ctrl + Shift + ] (bottom) on Windows and Command + Shift + [ or Command + Shift + ] on Mac.
These shortcuts help you adjust the visual effects and keep your layers organized. Use blending wisely to achieve that perfect look in your artwork.
Group and Merge Shortcuts
Grouping layers makes it easy to manage multiple elements. To group selected layers, press Ctrl + G (Windows) or Command + G (Mac). If you want to ungroup, simply press Ctrl + Shift + G (Windows) or Command + Shift + G (Mac).
Merging layers can simplify your workspace. Use Ctrl + E (Windows) or Command + E (Mac) to merge selected layers. To merge all visible layers, use Ctrl + Shift + E (Windows) or Command + Shift + E (Mac).
These shortcuts are great when you have many layers and need to combine them without clutter. Keep your projects tidy by using these efficient grouping and merging options.
While mastering Photoshop shortcuts, consider exploring ergonomic keyboards for comfort. Discover these uniquely angled keyboards in our Alice layout keyboard collection.
Selection and Transformation Shortcuts For Photoshop
Knowing the right shortcuts in Photoshop can make your work faster and easier. Here are some important keys for selecting and transforming objects in your projects.
Quick Selection Shortcuts
Quick selection is key for getting your work done smoothly. Use the Quick Selection Tool by pressing W. It helps you paint over an area to select it. If you want to select multiple areas, hold down the Shift key while you click.
To select everything in your document, just hit Ctrl + A (Windows) or Command + A (Mac). If you must deselect an area, press Ctrl + D (Windows) or Command + D (Mac).
Try the Magic Wand Tool by pressing W again for those tricky selections and click on the area you want. Adjust the tolerance in the options bar to affect your selection range.
Transform and Resize Shortcuts
Transforming and resizing objects can change your project’s look. To show the transform box around a selected layer, use Ctrl + T (Windows) or Command + T (Mac).
You can drag the corners to resize. Hold Shift while dragging to keep the proportions the same.
To rotate, grab outside a corner and turn. If you want to flip an image, right-click inside the box and choose either Flip Horizontal or Flip Vertical.
To apply the transformation, hit Enter. To cancel, press Esc. These shortcuts ensure you can adjust your designs quickly and without fuss.
Path Selection Shortcuts
Using paths can create clean selections and shapes. The Pen Tool is perfect for creating precise paths. Activate it by pressing P. You can switch between the Path Selection Tool and Direct Selection Tool with A.
To select all paths, hit Ctrl + A (Windows) or Command + A (Mac). If you want to deselect, use Ctrl + D (Windows) or Command + D (Mac).
Keep practicing these shortcuts to enhance your Photoshop skills!
Color and Adjustment Shortcuts In Photoshop

Using the right shortcuts can make working with color and adjustments in Photoshop much easier. There are various tools and shortcuts available that help you enhance your images quickly and effectively.
Color Picker and Swatches
To pick colors quickly, use the Eyedropper Tool by pressing I. This tool lets you select any color from your image.
If you want to save colors for future use, create a swatch by clicking on the swatches panel. The Color Sampler Tool can help you keep track of specific colors, marking their locations in the image.
You can access the Color Picker by double-clicking the foreground color swatch at the bottom of the toolbar. This opens a window where you can mix and match colors.
Remember, you can reset to default colors (black and white) by pressing the D key.
Adjustment Layer Shortcuts
Adjustment layers are ideal for making non-destructive edits. To create a new adjustment layer, press Control + Alt + N + A on Windows or Command + Option + N + A on a Mac.
This brings up a menu where you can choose adjustments like brightness, contrast, or color balance.
For quick color adjustments, you can use the Tone Curve Panel. Press Control + M (Windows) or Command + M (Mac) to adjust curves.
This allows for fine-tuning of shadows, midtones, and highlights with ease. Use the Parametric Curve Targeted Adjustment Tool to adjust specific tonal ranges directly in your image.
Quick Color Correction Shortcuts
For quick color corrections, the Auto Tone function can be helpful. Press Shift + Control + A (Windows) or Shift + Command + A (Mac) to automatically adjust colors.
If you want to address specific hues, use the Hue/Saturation option with Control + U (Windows) or Command + U (Mac).
To check for clipping in highlights or shadows, remember these shortcuts: Alt (Windows) or Option (Mac) when dragging the sliders in the adjustment panels. You’ll see colored warnings indicating which areas are clipped.
Brush and Painting Shortcuts For Photoshop
Using shortcuts for brush and painting tools in Photoshop can speed up your workflow and help you create amazing art. By mastering these shortcuts, you can adjust brush size, blending modes, and opacity quickly, allowing you to focus more on your creativity.
Brush Size and Hardness Shortcuts
You can quickly change your brush size while painting. Use the [ and ] keys to decrease or increase the brush size.
This makes it easy to switch between details and broader strokes without taking your hand off the mouse.
If you want to adjust the hardness of your brush, hold Shift and press [ or ].
Soft brushes work well for blending, while hard brushes create clear lines. It’s smart to use the right hardness for your work.
Remember, keeping your brush at the right size and hardness helps improve the quality of your artwork.
Practice these shortcuts often to make adjustments second nature.
Blending Mode Shortcuts
Blending modes change how colors mix in Photoshop. To cycle through blending modes quickly, hold Shift and press the + or - keys. This lets you see how each mode affects your layers in real-time.
Here are some common blending modes to try:
- Normal: No interaction between layers.
- Multiply: Darkens the base color.
- Screen: Brightens the base color.
Using these shortcuts can help you choose the best blending mode for your project without wasting time.
Experiment with blending modes to find what works best for your style.
Opacity and Flow Shortcuts
Adjusting opacity and flow is vital for smooth painting. You can quickly set the opacity of your brush by pressing a number key.
For example, pressing 1 sets it to 10%, 5 sets it to 50%, and 0 resets it to 100%.
To change the flow, hold down Shift and then press the number keys.
This gives you control over how your paint is applied, making it easier to achieve your desired effect.
Mastering these shortcuts allows you to create depth and layers in your artwork without interrupting your flow.
With practice, you’ll find yourself adjusting these settings without even thinking about it.
Just as choosing the right Photoshop shortcut can speed up your work, selecting the perfect keyboard switch can elevate your typing experience. Browse our keyboard switch collection to find your ideal match.
Text Editing Shortcuts In Photoshop
When working with text in Photoshop, keyboard shortcuts can save you time and improve your workflow. You can quickly access the tools you need and format your text efficiently.
|
Category |
Shortcut |
Description |
|
Tool Selection |
T |
Select the Type Tool |
|
V |
Select the Move Tool |
|
|
Text Editing |
Ctrl/Cmd + Enter |
Commit text changes without starting a new paragraph |
|
Shift + Arrow Keys |
Nudge text 10 pixels (while Move Tool is active) |
|
|
Text Formatting |
Ctrl/Cmd + B |
Make selected text bold |
|
Ctrl/Cmd + I |
Make selected text italic |
|
|
Ctrl/Cmd + Shift + > |
Increase font size |
|
|
Ctrl/Cmd + Shift + < |
Decrease font size |
|
|
Ctrl/Cmd + E |
Center text |
|
|
Type Tool Switching |
T |
Switch to Horizontal Type Tool |
|
Shift + T |
Switch to Vertical Type Tool |
Filter and Effects Shortcuts For Photoshop
Applying filters and effects quickly can make your photo editing smoother and more fun. You can use specific keyboard shortcuts to save time and make your workflow more efficient. Here’s how to use these shortcuts effectively.
Quick Filter Application
Applying filters in Photoshop is easy with shortcuts. To use the Quick Filter feature, you can press Ctrl + Alt + F (or Command + Option + F on Mac).
This opens the most recent filter, making it simple to adjust and reapply your last effect.
You can also use the Filter Gallery to see all the filters at once. Press Alt + Filter to open this gallery.
Once there, click on any filter you want to try.
Remember, you can apply adjustments with tools like the Clone Stamp Tool and Healing Brush Tool.
For quick edits, the Spot Healing Brush Tool is handy, as it helps fix small blemishes effortlessly.
Liquify and Blur Shortcuts
The Liquify filter helps transform images in creative ways. You can access it by pressing Shift + Ctrl + X (or Shift + Command + X on Mac).
In the Liquify window, you can push, pull, and warp your image easily.
For blur effects, use the Motion Blur filter. Simply press Ctrl + Shift + F (or Command + Shift + F on Mac) to open the Motion Blur menu.
Here, adjust the distance to control how blurry the image should get.
The Dodge Tool brightens specific areas, and you can select it quickly with the O key.
Each of these shortcuts helps you add unique effects to your photos without wasting time.
Time-Saving Photoshop Shortcuts For Pros

Using keyboard shortcuts in Photoshop can save you a lot of time and effort. With just a few keystrokes, you can streamline your workflow and tackle bigger projects with ease. Let’s look at some essential shortcuts that can help you work faster.
Action and Batch Processing Shortcuts
Actions in Photoshop allow you to record and automate tasks. This is incredibly helpful when you repeat certain steps often.
To create a new action, just press Alt + F9 to open the Actions panel.
Here are some useful shortcuts:
- Record an action: Click the "Create New Action" button.
- Stop/Play an action: Use F12 to stop or replay your recorded action.
- Batch processing: Go to File > Automate > Batch to apply actions to multiple files at once.
These shortcuts can help you save time on repetitive processes, allowing you to focus on creative tasks.
Content-Aware Fill Shortcuts
Content-Aware Fill is a powerful feature for removing objects from images. It analyzes the surrounding area and fills in gaps smartly. To use this feature quickly, follow these shortcuts.
- Select the area: Use the Lasso Tool (L) to highlight what you want to remove.
- Open Content-Aware Fill: Press Shift + F5, which opens the Fill dialog. Then choose Content-Aware from the drop-down menu.
- Preview and apply: Click OK to see the results. If it’s not right, you can easily undo with Ctrl + Z.
Photoshop shortcuts free you from constant menu navigation, much like how wireless keyboards liberate you from wires. Experience the freedom of wireless typing by exploring our Bluetooth collection today.
Customizing Photoshop Keyboard Shortcuts
You can make your workflow in Photoshop much smoother by customizing keyboard shortcuts. This means you can create shortcuts that fit your needs better or reset them if you need the original settings back. Let’s explore how to do this.
Creating Personal Shortcuts
To create your own shortcuts, start by selecting Edit from the top menu. Then choose Keyboard Shortcuts.
- Find the Command: Browse the list or use the search bar to locate the tool or command you want to change.
- Set a New Shortcut: Click on the command and enter a new key combination you want to use. Make sure it doesn’t conflict with existing shortcuts.
- Save Your Changes: After setting the new shortcut, save it. You can name your set for easy access later.
This way, you can quickly access functions like adjusting image size or changing the canvas size without searching through menus.
Resetting to Default Shortcuts
If you've customized shortcuts and want to go back to the original settings, it's easy!
- Open Keyboard Shortcuts: Go to Edit and select Keyboard Shortcuts again.
- Reset Options: At the bottom of the dialog box, you’ll see an option to reset. Click Reset to Default.
- Confirm Your Action: A dialog will pop up asking if you're sure. Click OK to confirm.
This restores all Photoshop shortcuts back to their original keys. It can help if you don’t remember what changes you made or miss the default tool shortcuts.
Photoshop Shortcut Cheat Sheet
Using keyboard shortcuts in Photoshop can boost your efficiency and help you work faster. Here are two useful ways to keep track of these shortcuts: a printable guide and an online interactive reference.
Printable Shortcut Guide
A printable cheat sheet is a handy tool you can keep on your desk. It provides a quick reference to the most important shortcuts. You can find or create one that covers various categories like tools, navigation, and layer commands.
Here are some common shortcuts you might include:
|
Action |
Shortcut |
|
Move Tool |
V |
|
Rectangular Marquee Tool |
M |
|
Lasso Tool |
L |
|
Magic Wand Tool |
W |
|
Crop Tool |
C |
Print this guide and keep it visible. This way, you can easily find shortcuts when you need them.
Online Interactive Shortcut Reference
An online interactive shortcut reference offers an engaging way to learn and remember shortcuts. Websites often display a full list of shortcuts and let you search for specific ones.
Some websites even allow you to customize and print your own shortcut sheet. You can interact with the tool to get instant feedback.
For example, if you're learning to use the Lasso tool, you can quickly see which keys to press. This method helps you practice in real time, making it easier to remember.
Check out various resources to find the one that fits your style best.
Conclusion
Photoshop keyboard shortcuts are essential tools for efficient editing. From Ctrl+A for select all to custom combinations, these key presses eliminate menu navigation and enhance your workflow.
Regular practice turns these shortcuts into second nature, allowing you to focus on creativity rather than interface navigation.
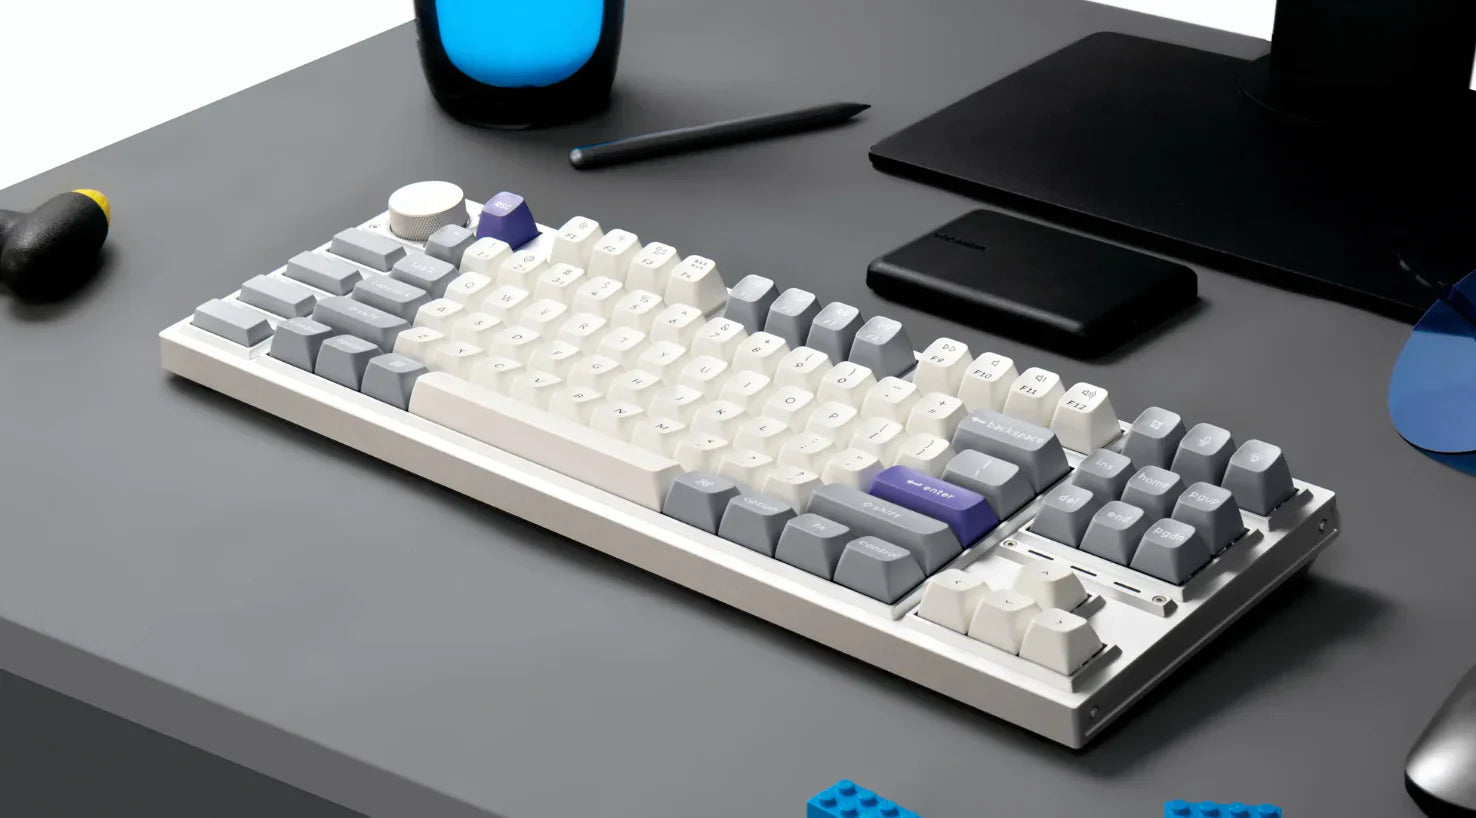
To further improve your shortcut efficiency, consider pairing your skills with a Keychron mechanical keyboard and mouse. Its responsive keys make executing shortcuts more precise, significantly boosting your Photoshop productivity.
Ready to transform your digital art process? Explore these shortcuts and discover Keychron's range of professional-grade keyboards.
Frequently Asked Questions on Photoshop Shortcut Keys
What are the shortcut keys for Photoshop?
Photoshop has numerous shortcut keys to enhance productivity. Common shortcuts include Ctrl+C (copy), Ctrl+V (paste), and Ctrl+Z (undo). For tools, use "M" for rectangular marquee, "L" for lasso, and "W" for quick selection. Layer shortcuts include Ctrl+J to duplicate and Ctrl+E to merge layers.
What are the 20 keyboard shortcuts?
Essential Photoshop shortcuts include Ctrl+N (new document), Ctrl+O (open), Ctrl+S (save), Ctrl+Z (undo), Ctrl+C (copy), Ctrl+V (paste), Ctrl+T (free transform), and Ctrl+J (duplicate layer).
Tool shortcuts are B (brush), E (eraser), M (marquee), L (lasso), W (quick selection), I (eyedropper), and G (gradient). Other useful shortcuts are R (rotate view), Spacebar (hand tool), Ctrl++ (zoom in), and Ctrl+- (zoom out).
How to see keyboard shortcuts in Photoshop?
To view Photoshop shortcuts, go to Edit > Keyboard Shortcuts or press Alt+Shift+Ctrl+K (Windows) or Option+Shift+Command+K (Mac). You can also hover over tool icons to see their shortcuts in tooltips. Shortcuts are also listed next to commands in the menu bar for quick reference.
What does Ctrl+K do in Photoshop?
Ctrl+K (Command+K on Mac) opens the Preferences dialog box in Photoshop. This command allows you to customize various settings such as performance options, file handling, and interface appearance. It's essential for personalizing your Photoshop environment and optimizing your workflow.